
John Muir Vernal Falls Trailhead to Half Dome Summit


14.6 MILES / 6,283 FT ELEVATION
full-day hike
SEASON: May - October
The Half Dome day hike is a strenuous, high elevation all-day hike in famous Yosemite National Park requiring an early morning start to finish during daylight hours. However, it is also one of the most scenic hikes in Yosemite, passing by 317 ft Vernal Falls and 594 ft Nevada Falls on the way to the Half Dome summit. Permits are required in order to climb the cables in the final stretch to reach the summit. These permits are limited and distributed by lottery each year after taking applications in March. The cables are up late May through early October if conditions allow.
PAGE CONTENTS:
HIKE DESCRIPTION
MAPS & GPX
PREPARATION & PRO TIPS
DIRECTIONS
Hike Description
Half Dome is one of the most famous landmarks in the US, as is Yosemite National Park. This fame is well-deserved, as the scenery in this part of California is truly unbelievable. The granite rock landscape creates the high peaks which refuse to erode, as well as the awe-inspiring waterfalls. These geological features are accompanied by lush forests of giant sequoia and abundant wildlife. If you manage to snag a permit for this hike and are not too terrified of heights, this will be an experience you aren't likely to forget. See below for more information on obtaining a permit and other preparation information.
The hike begins at the John Muir Vernal Falls Trailhead in Yosemite Valley. This trailhead can be found at the end of the parking lot east of Half Dome Village. If you have trouble finding parking near the trailhead, you can always park at Half Dome Village and take one of the many shuttles to the trailhead. Make sure you start the hike early! We got started on the trail at 6AM in the morning.
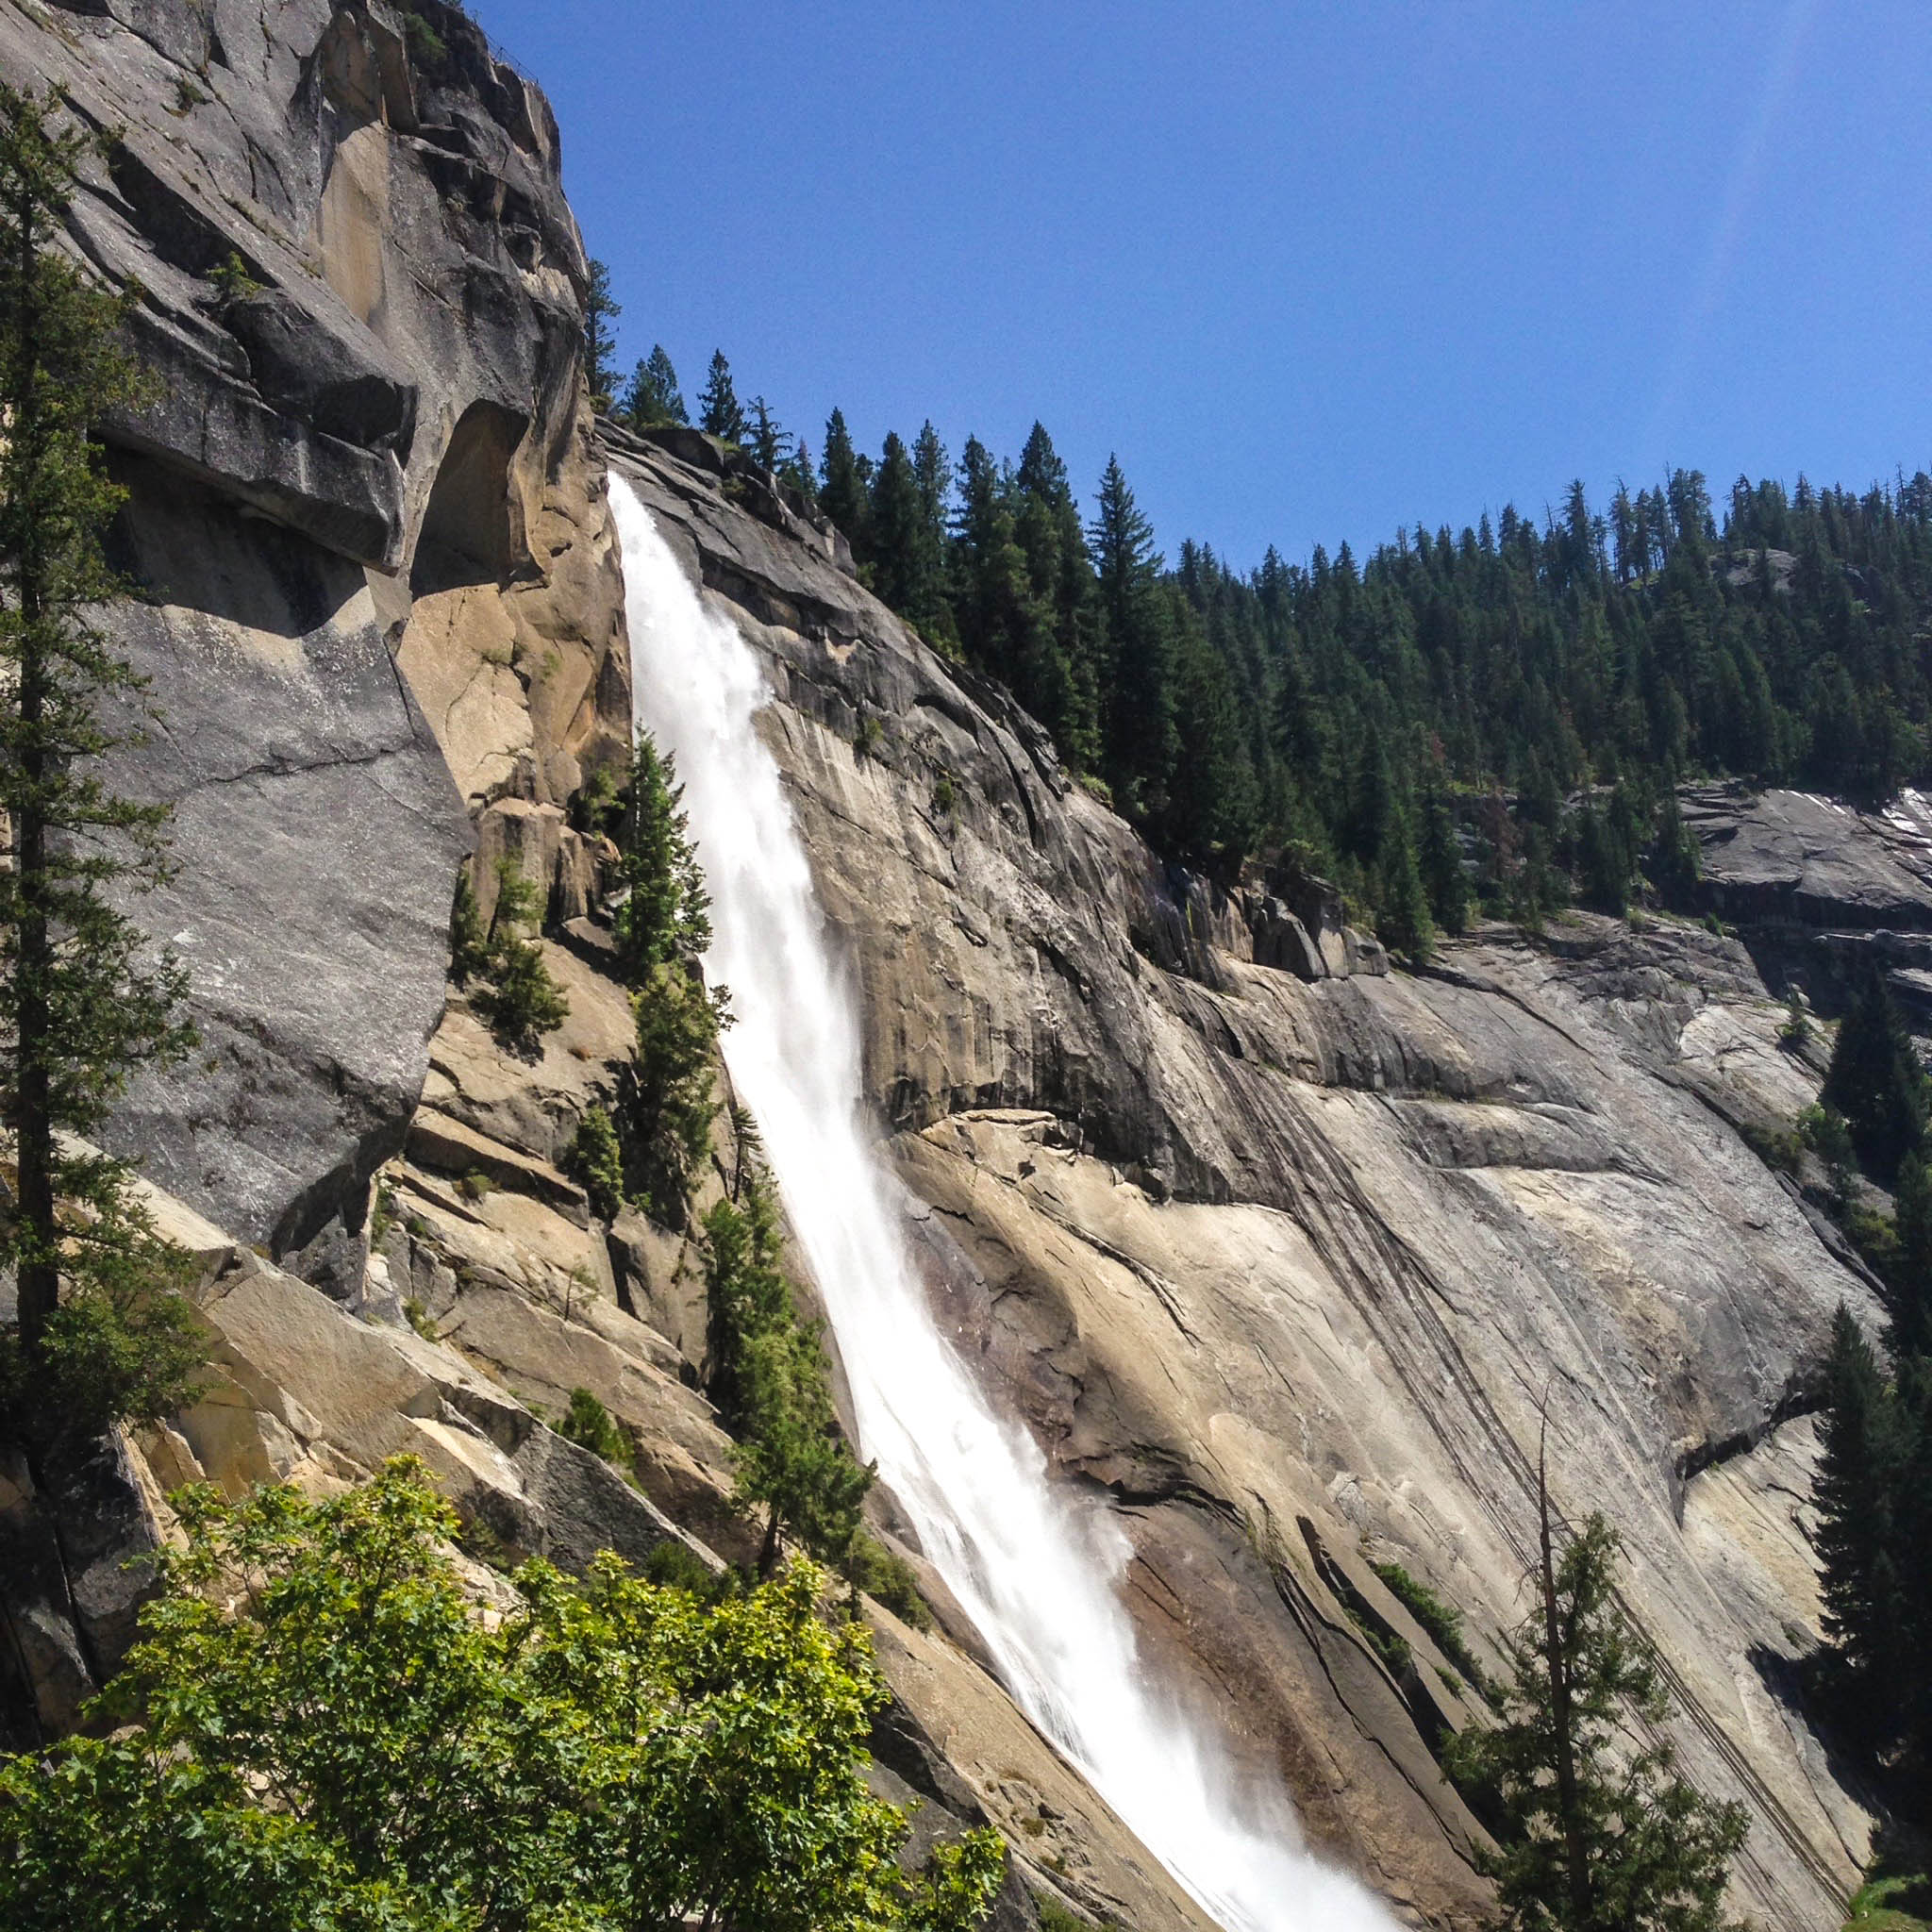
At 0.8 miles into the trail, a footbridge crosses the Merced River with excellent views of Vernal Falls in the distance. This is the last spot with a water fountain, so top off your water if needed. Another 0.2 miles past this bridge the trails diverge, with Mist trail continuing to the left and John Muir Trail to the right. Either trail leads towards Half Dome, but the more scenic path is definitely the Mist Trail which takes you up Vernal Falls right next to the 317 ft waterfall. Be prepared for a leg workout as you ascend over 600 steps carved into the granite next to the falls.

Just after passing Vernal Falls you again have two options. You can remain to the left on the Mist Trail to continue hiking next to the Merced River directly towards Nevada Falls, or you can take the slightly longer way to the right by joining up with John Muir Trail and coming around on the mountain side with a more panoramic view of Half Dome, Liberty Cap and Nevada Falls. We chose to take the John Muir Trail upon ascent to get this sunrise view.
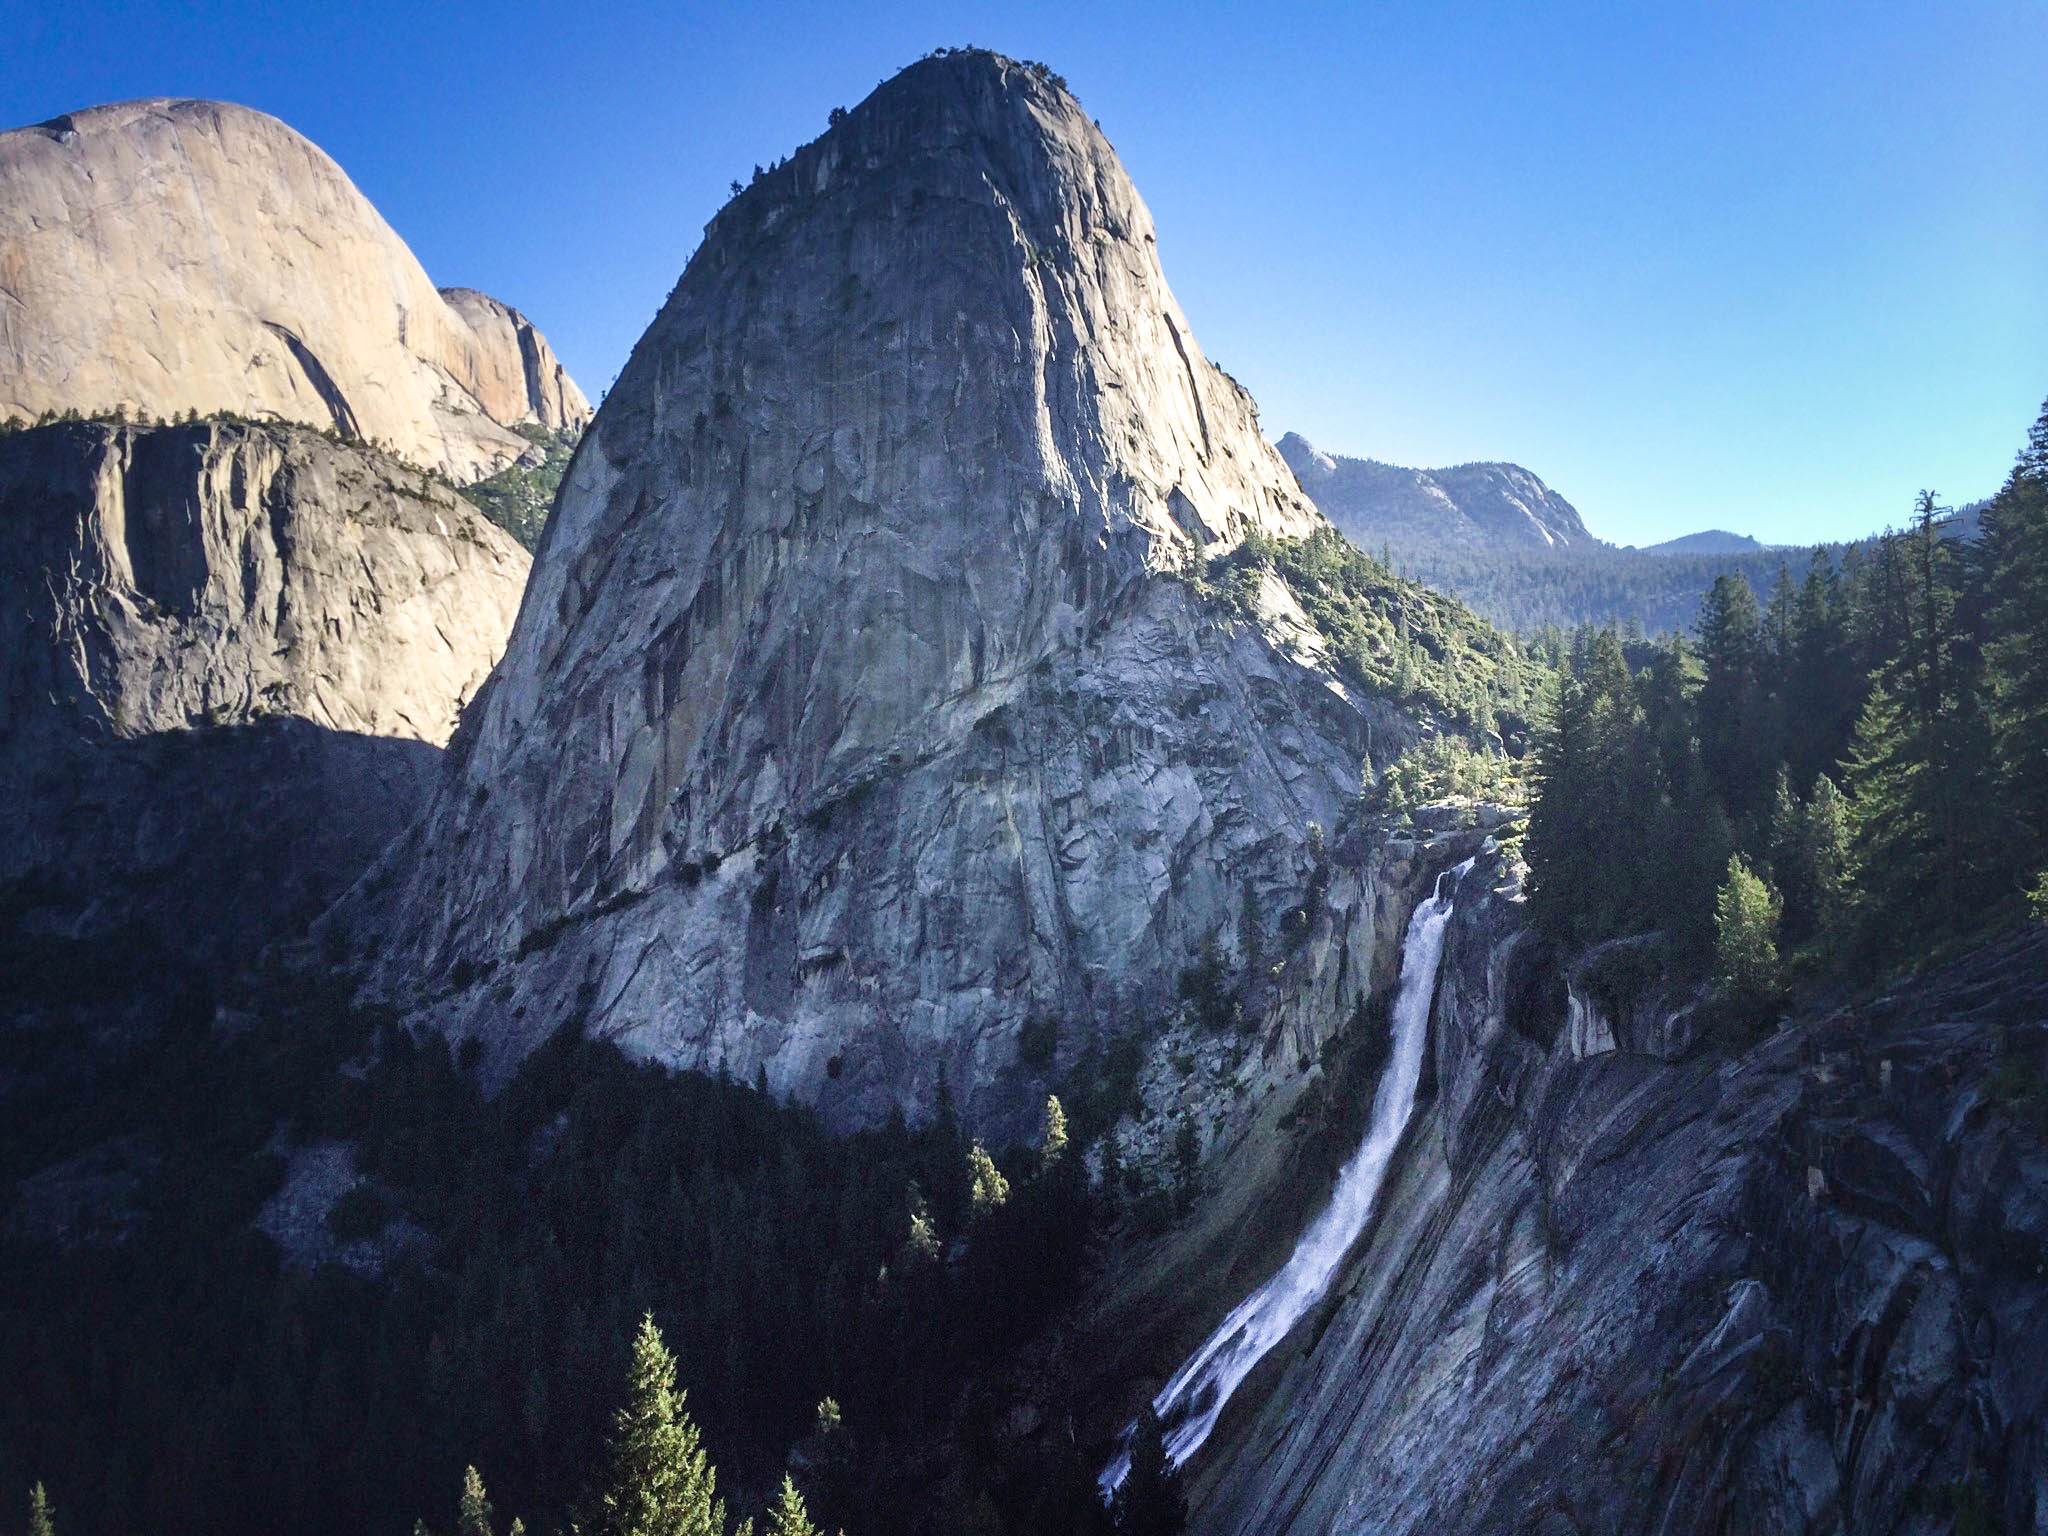
After coming around the mountain, you will hit the Merced River again at the top of Nevada Falls and cross over to continue the hike towards Half Dome summit. The area just north of Nevada Falls is a popular rest stop with easy access to fill up your water out of the stream, or to even take a quick dip to cool off. Once you pass Nevada Falls, you have another ~4 miles and 2,100 ft of steady uphill climbing before hitting the Half Dome cables.
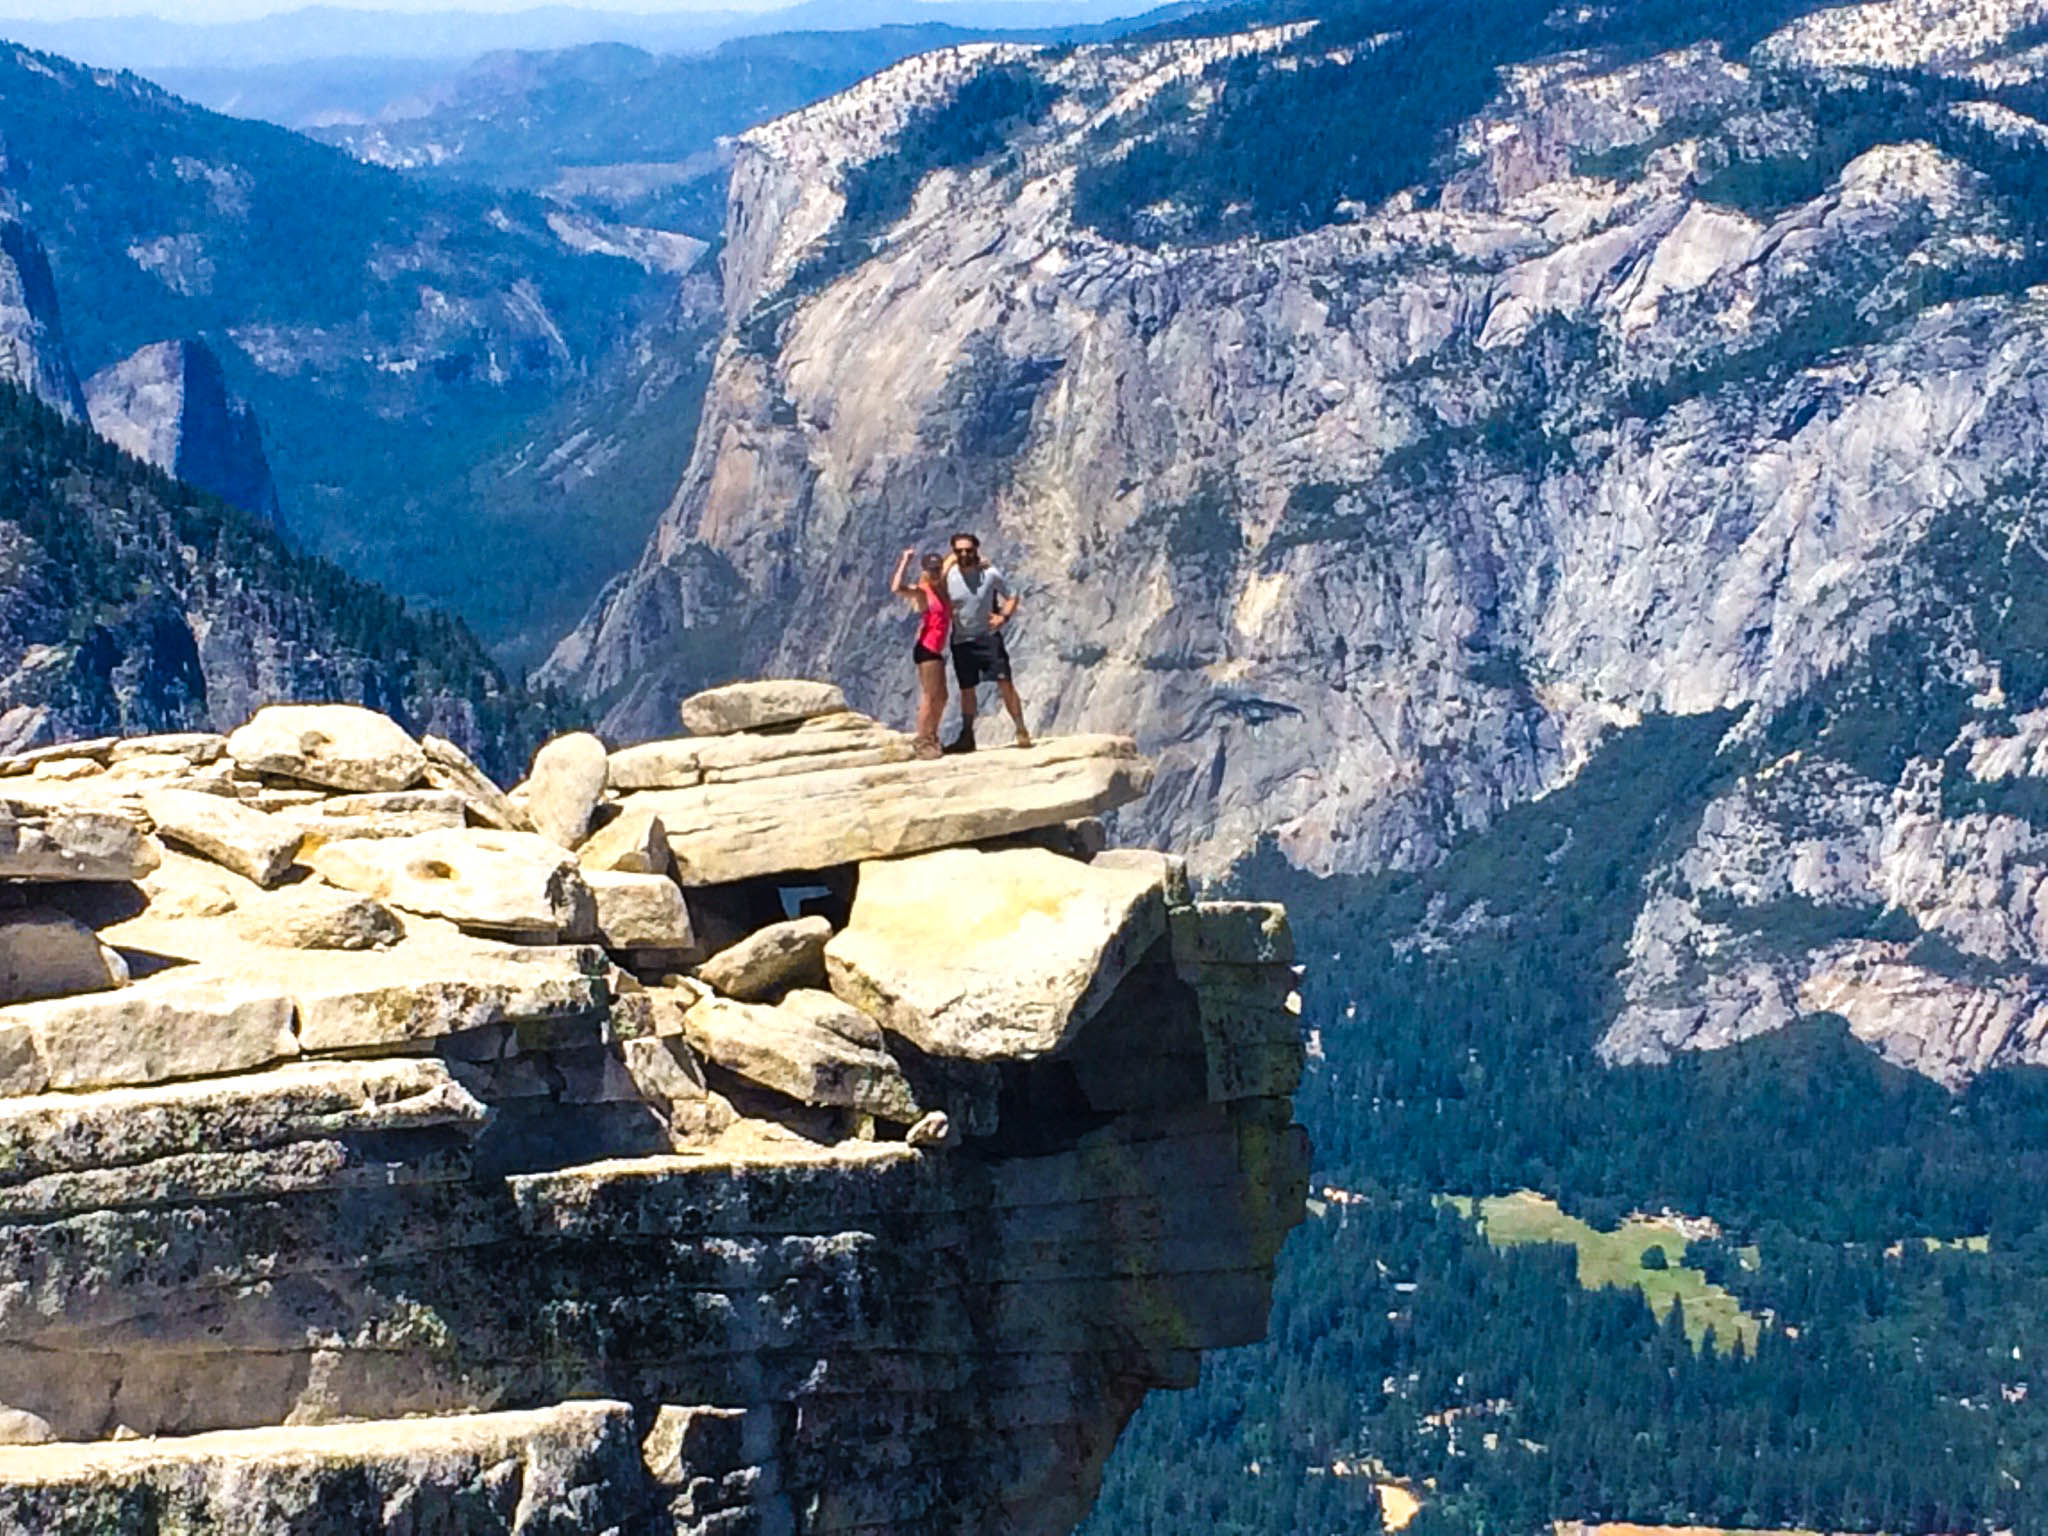
Once you get close to the cables, you will most likely come upon a ranger that will check to make sure you have a cable permit for that day. After this point, the hike begins to get more treacherous and not for those with fear of heights. For the half mile prior to the cables, the hike consists of scrambling up granite rock, sometimes needing to use your hands. Upon approach to the cables, you will see what looks like a line of ants making its way to Half Dome summit. These cables will assist you in climbing the final 400 ft to the summit.

This section consists of steel cables affixed to metal poles which are placed into holes drilled into the granite. Each pole also contains a strip of wood creating a kind of ladder on which you can rest your feet. Climbing the cables requires pulling yourself up the cables with your hands from one piece of wood to the other. There is only one area for those who are going both up and down, so usually progress is relatively slow. Exercise caution while climbing these cables, a slip could mean a fatal fall. Once at the top, take time to take in the amazing vantage point views and maybe do a little testing of your fear of heights, with photos to prove it of course.
The hike down is arguably the more difficult part of the hike, as the relentless downhill grade does a number on your knees. We highly recommend high quality poles to help soften the burden. On your way down, take an alternate route to get some new views. We recommend taking the Mist Trail down Nevada Falls this time to get another impressive view of these 594 ft falls (or vice versa if you took this trail on the way up).
Maps & GPX
With the GPX route downloaded on your phone, you can follow your location against the trail, even in airplane mode or when you have no service. To learn more about GPX files and how to use them, see the GPX 101 page.
You can download the GPX file using the following link --> GPX FILE DOWNLOAD
Trail Map
Elevation Map

Preparation & Pro Tips
- Apply for a permit - In order to climb the Half Dome cables you must win a permit by lottery. To apply for the lottery, fill out the Day Permit application. In the application form you list the number of permits (6 maximum) and dates you are applying for. Applications are taken March 1st - March 31st each year, and lottery results are posted mid April. If you win an permit in the lottery, you must purchase it within two weeks of announcement in order to claim it. Permit dates available correspond with when the cables are up which is usually late May to early October each year.
- Gloves - Make sure to bring gloves to use on the cables; you are at risk of chafing your hands if you try to climb them without gloves.
- Poles - This is a hike that benefits greatly from a good pair of trekking poles, especially for the downward trek off the Half Dome summit back to the valley floor.
- Water - Make sure to bring a lot of water for this long and likely hot hike. We brought two water bladders in our packs to ensure we were bringing enough water. It is also advisable to bring a water filter so you can pull water from Merced River if needed.
- Plan and pack your gear - See our Gear Checklist section for a comprehensive gear checklist and some tips and favorite items of ours.
- Extending your stay - If you plan to backpack for several days with Half Dome as part of your trip, you can apply for a Wilderness Permit instead of the typical Day Permit noted above.
Directions
The trailhead beings right across Happy Isles Bridge at the end of the parking lot east of Half Dome Village. Click on the directions icon to pull up custom directions in Google Maps.